NOTE: If you use Barnestorm Point-of-Care, you must use the assessment to create the 485. This ensures that all documentation matches for audit purposes. The process shown below is for Barnestorm Office users only.
Creating a New 485
1. Select a patient on the first Barnestorm Office screen by typing in either the first 3 digits of the patient’s chart number or the first 3 letters of their last or first name.
2. Click the patient’s name to select them.
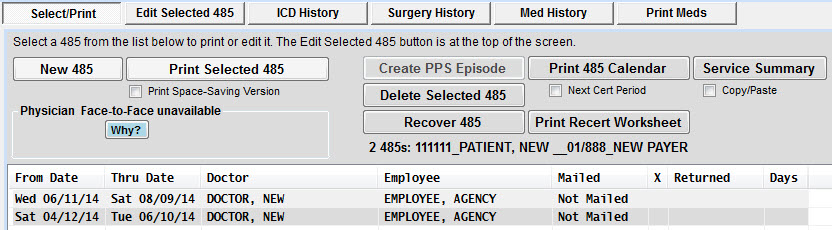
3. Click the 485 button from the Main Menu. This will show any existing 485 episodes.
4. From here you have two scenarios:
New Referral with the first episode - Enter the appropriate information into each field and click on Create a New 485. F2F Physician only needs entered if different from the ordering physician.
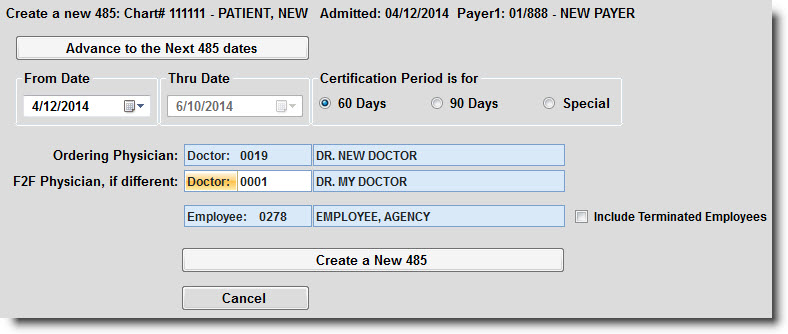
Entering a Recertification episode - Click on the New 485 button, enter the appropriate information into each field and click on Create a New 485.
5. As soon as you click on the Create a New 485 button, the screen will switch automatically to the Edit Selected 485 tab, where you will enter each box of the 485.

ICDs and Meds: Any ICD codes and medications already entered will appear here. Only codes and meds with an effective date on or before the 485 From date will appear.
Box 12 Surgeries: Select which surgery codes will need to appear on the 485. The codes in the right pane will print on the 485. Only surgery codes dated on or before the 485 From date will be an option to select.
Box 14 - 20: Check each option that needs to appear on the 485. Type any additional text in the comment boxes.
Box 21/22:
A) Build from Disciplines - Finds the most recent POC assessment from each discipline (within the last 20 days)and combines the orders.
B) Copy from Last 485 - Inserts the text from the previous 485’s box 21/22.
C) View 485 Calendar - Pulls up a blank calendar for the episode selected.
D) Copy OASIS M2250 a-g - This will copy forward the last set of answers to OASIS question M2250. If text is already filled in on box 22 then a message will appear asking how you want to insert the OASIS answers.
E) User Order/Goal Builder - This tool associates an order T-box item with a goal t-box item, so that you can add the group at the same time, and by category. It simplifies the process ofselecting and adding orders and goals to the 485. We can assist clinical directors with setting up the tool.
F) Use the Text Item box to add pre-written text to the box (see attached article for details on this feature).
Box 23: Change the ordering physician, add a Face-to-Face physician if different from the ordering physician, change the employee who is completing the 485, change the cert period if it was created with an incorrect date, add Verbal SOC Date to 485, Save 485 changes.
6. After entering all of the appropriate information you can save the 485 from the Box 23 page or by exiting the 485 page.
7. As needed, you can continue on to the ICD History,Surgery History and Med History tabs to add or modify information. Note: You'll have to edit the 485 to pull in any new information.
8. Click on the Select/Print tab, select the 485 and click on Print Selected 485. Print the 485 as needed.
Editing an Existing 485
1. Select the patient from the Select Patient screen.
2. Click on the 485 tab from the main menu.
3. Select the episode you need to edit.
4. Click the Edit Selected 485 tab.
5. Modify each box of the 485, as needed. See details under Creating a New 485 above for each box screen.
6. After entering all of the appropriate information you can save the 485 from the Box 23 page or by exiting the Edit Selected 485 page.
7. As needed, you can continue on to the ICD History,Surgery History and Med History tabs to add or modify that information. Note: You'll have to edit the 485 to pull in any new information.
8. Click on the Select/Print tab, select the 485 and click on Print Selected 485. Print the 485 as needed.