From Barnestorm Office: From the Select Patient screen, click on Patient Histories > Hospice Care Plans.
From Barnestorm POC: From the Select Patient screen, click on Hospice Care Plans tab.
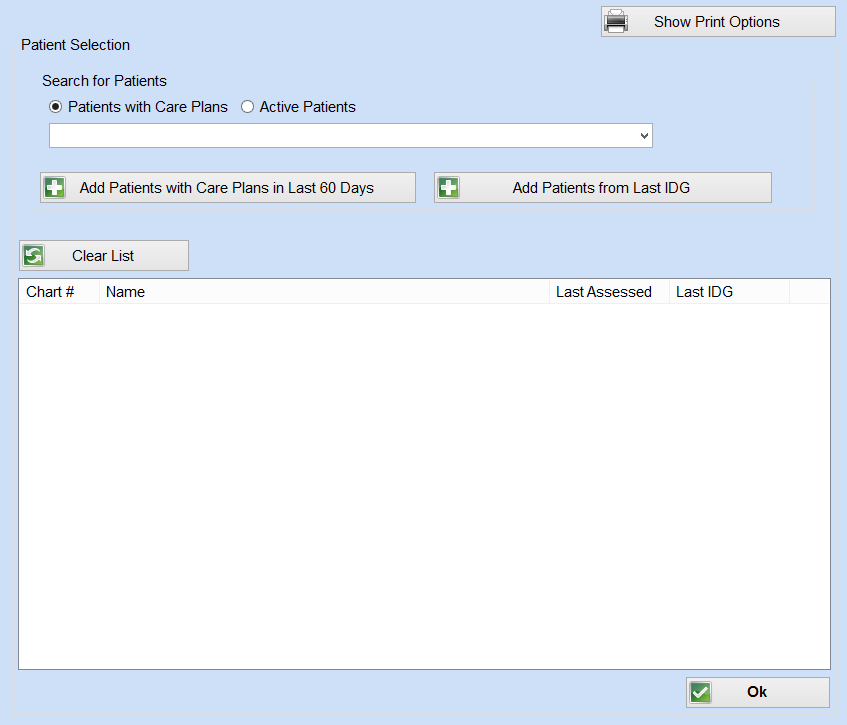
Selecting Patients
At the Patient Selection screen, select the group of patients you wish to work with:
- Click the button Patients with Care Plans, then click Add Patients with Care Plans in Last 60 Days button, or
- Click Add Patients from last IDG button.
After patients are selected, click the OK button in the lower right corner.This opens the main screen for selecting primary activity, either CarePlan workor IDG work.
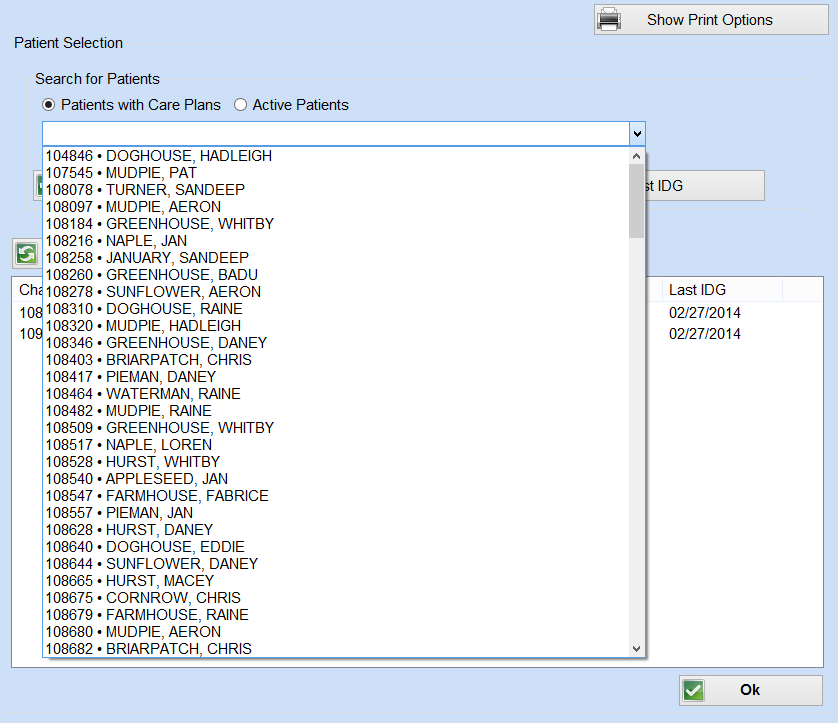
To Add a Patient
- If the patient does not have a care plan, click the Active Patients button, which will pull up all active patients.
- Type the first 3 letters of the patient's last name and a pop-up list will appear from which to choose the patient by clicking on patient's name.
- Click Add Patient. (Note: If selecting patients with care plans and some without current care plans, select the patients with care plans first using the Patients with Care Plans in Last 60 Days or Add Patients from Last IDG button as the patient list will overwrite Active Patients/Add Patient selection).
- After patients are selected, click the OK button in the lower right corner. This opens the main screen for selecting primary activity, either CarePlan work or IDG work.
To Remove a Patient
To remove a patient from the list, select the patient's name from the selected patients list and click the Remove Patient button.
Care Plans
Select Problems button.
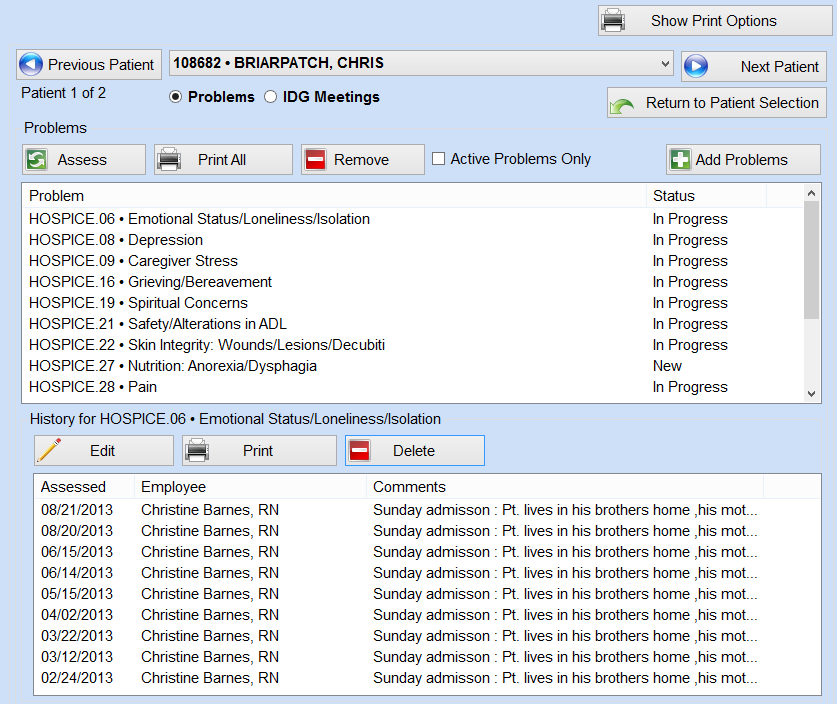
This screen shows the total number of patients brought forward to work with from the previous Patient Selection screen, the patient's chart number and name that you are currently working with, the list of problems identified, current status of each problem. You may also use the following functions with problems: Edit, Print, or Remove. Note: If you Remove a Problem, you will also remove all entries associated with that problem.
Assessing the Patient and Documenting the Care Plan
- To document a problem, Click on Assess.
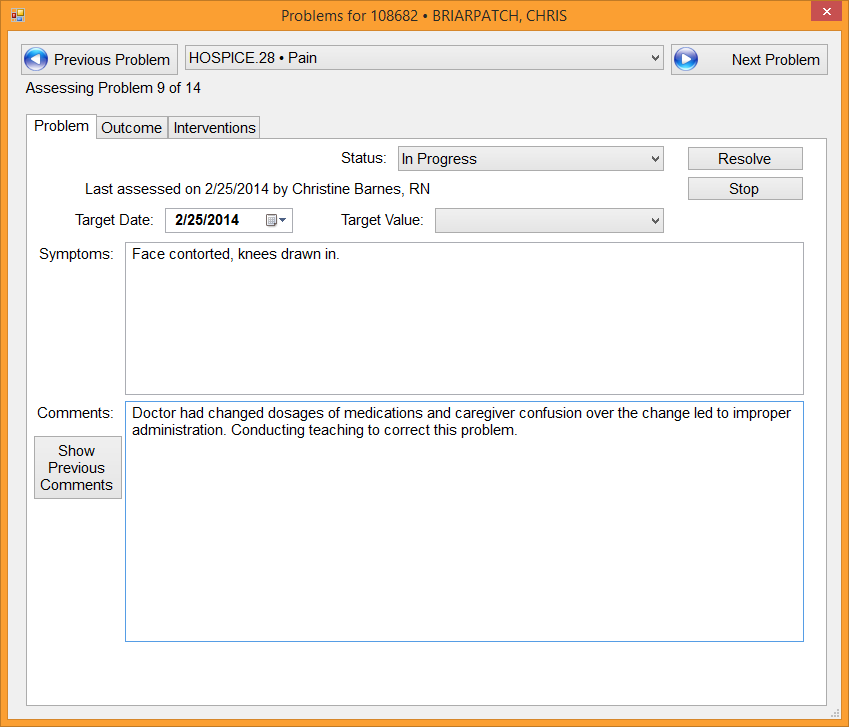
- Each of the patient's problems will be presented sequentially. The first problem is loaded automatically.
- If you want to document on specific problems, click the problem bar (top center) to open a drop down of patient's problems, and click on the problem to document/edit. For each problem, you may document Status from the drop down, Target Value from the drop down ( 1 to 5, 1 severe, 3 moderate, 5 none, or NA), Resolved, Stop, Symptoms and Comments.
- Problem- Used for entering the symptoms, comments, and optionally a target date and target value.
- Outcome- Used for entering values for each indicator related to the outcome. A value is averaged from the answered indicators, but these may be overridden by typing a value into the Value text box. Outcome values carry through from visit to visit, but you can change them if the outcome prediction changes.
- Intervention- Used for reviewing which actions were performed on the visit, which actions are not needed (NA), and which actions have been resolved. You may also provide additional information by using the drop down to show why the action has not been resolved.
- To advance to the next patient, click on Next Patient button located on the right upper corner under Print options.
- To print the care plan, click on Show Print Options button, select the options, then click the Print All button located just above the Problems listing.
To edit any of the previous entries, click on the associated problem in the problem list, verify the selected problem appears in the gray bar just below the problem list, then click the Edit tab. To edit a previous assessment, click on the associated date, then click Edit. As you navigate through a patients problems, you may notice that editing is disabled on some of them. Editing of the last problem assessment is only available if you are the employee who did the assessment or you have an administrator access level.
When you have finished documenting the care plan, click Return to Patient Selection or any tab on the left column menu. To exit from the assessment or edit screen, click on the red X in the upper right corner. (Note: Wherever there is a RED “X” in the upper right corner, clicking on that serves as the save and close function . If there isn't a Red X, there will be a Save or Exit tab that should be used to ensure proper closure.)