Post Electronic Remittance Advice
You will use Accounts Receivable > Post Payments >Post Electronic Payments to post .835 and .ERN files.
Select ERA Files
- If your agency has multiple payer types, use the selector at the top of the screen to choose All Other.
- Select the folder where the ERA files are saved.
- A list of available 835 files will appear. Select the file you need to post.
Process the ERA File
- Click Process this 835/ERN File.
- This saves ICNs for rebilling and creates service line posting details.
ImportantThe checkbox next to this button is only used if a software update requires an ERA to be re-posted, 'Reprocess 835/ERN file'.
Review & Print (Optional)
- Print Summary
- Shows amount billed, amount paid, amount noncovered, and a summary for the amount noncovered with adjustment reason codes.
- Print Detail
- Shows each patient dates of service range, with total amount billed and paid.
- Print Denials option - run this to see which visits did not pay and why.
- This shows the EOB edit code, adjustment reason code, HIPAA remark code.
- Include All Unpaid Services prints all unpaid lines.
- Skip 45 omits contract adjustments to shorten the report.
Create ERA Entries & Post to A/R
- Click Create ERA Entries.
- Only use the 'Replace previous posting...' checkbox if you are reposting the file.
- When prompted, review the A/R Posting Date (defaults to bank date) and click OK.
- There's an optional checkbox if you have multiple NPIs posting.
- Print the report if needed, then click Close.
- At this point, the process has collected the information to post. The report will show you the payment and adjustment amount for each patient/claim.
- Click Post to A/R and select OK when processing completes.
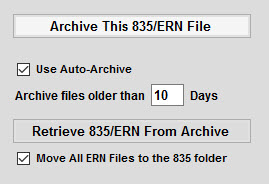
Archive the ERA File
- After posting is complete, click Archive This 835/ERN File to remove it from the list.
- Click the Create ERA Entries button to generate payment entries. A Set A/R Posting Date pop up box will appear. It will default the bank date, only change it as needed, click on OK. Print the report as needed and then click the Close button.
- Click the Post to A/R button. A pop-up box will appear once it is finished. Click on OK.
Create PPS Adjustments
- PPS Payers Only: If you are posting PPS payments you will then need to click the Create PPS Adjustments button. These steps will post any adjustments, as well as mark the episode as Paid/Complete. The following window will appear:
- PPS Payers Only - Check the box above Step 1. This will make sure nonMedicare AR is posted correctly.
- PPS Payers Only - Click the Step 1 - Update PPS Tracking button. (If no new payments are found, the process stops here. If payments are found, the Step 2 button will activate.) Click Close to exit the preview.
- PPS Payers Only - Click the Step 2 - Create A/R Adjustments button. (If nothing is found, the process stops here. This can occur if payer made payment in full.) Click Close to exit the preview.
- PPS Payers Only - Click Step 3 - Post to A/R button to complete the posting/mark episode as Paid/Complete. You can now click X to close the window.
- Once posting is complete and you want to remove the ERN file from the screen. Click the Archive This 835/ERN File button to remove the ERA file from the list. Check Move All ERN Files to the 835 folder if that is what you want to do.