Wound Assess (Old) Video: Wound Assess (Old Screen) - YouTube
Point of Care > Visits/Assessments > Wound Assess. This screen may show up under Optional. Once there is an active wound documented, the Wound Assess will show up under Required.
You will have the option to Select an existing Wound or create a New Wound.
The wounds that are healed will only appear on this screen when you check the box "Future Wounds".
Select a Wound: This will show you a list of all wounds, the last time they were assessed or the date it was marked as healed.
After selecting the wound you need to assess, it will pull up the wound screen with the description and location filled in. The wound measurement may copy forward if your agency has that feature turned on.
New Wound: To create a new assessment for a wound, click the New Wound button. You will notice that the wound has been assigned a number at the top of the screen. If this is the first wound for the patient, this will show: "Assessment for Wound #0001."
Documenting the Assessment
Select the type of wound by clicking on one of the type options. If the type is not listed, you can enter it in the text box. You must specify wound type.
If the wound is a pressure wound, you may select the stage of the wound. If you do not remember the stages, click the Show Stages button. The stages of the wounds will be displayed. After you figure out which one you require, click the Hide Stages button.
To specify the location of the wound, you can either (1) type in a location, or (2) click on the * button beside the location box . The screen below will pop up when you click the * button.
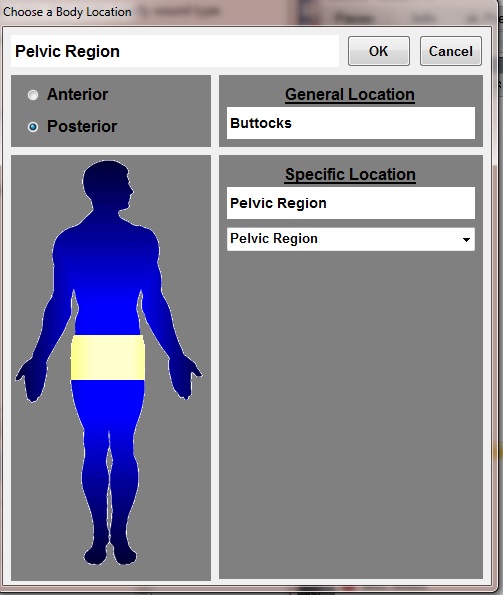
Select either Anterior or Posterior. Then, select a location on the body that corresponds to the General Location of the wound. Click on the image to select the area. After the general location has been selected, you can choose a specific location by using the pull-down tab. Click the OK button. The wound location will be filled in.
NOTE: If the location is not filled in, the wound entry will NOT be saved. At this point you have filled in all the required fields for this wound. The rest of the fields are optional.
You will notice that the description at the top of the screen is filled in with the options that you have selected.
There are some optional buttons to help you quickly enter more information about the wound. Click on any button that matches information you wish to enter.
The intent of these screens is to save time by clicking on buttons instead of typing. But, if you wish to type in a description of the wound, do so, and then click the OK button. As you click on the buttons, those descriptions will be highlighted in yellow, and appear inside the description box. Click OK when you are done. You will be taken back to the wound main screen.
You can select a Status for the wound as well. Located at the bottom of the screen.
Additional Comments can also be entered. Located at the bottom of the screen.