Create Verbal Orders / Informational Orders
Create Verbal Order Video: Verbal Order - YouTubeThis video looks outdated, for most features they are still the same process.
- Select the patient from the Select Patient screen.
- Go to Orders > Add / Edit Orders, from Point of Care select the Orders screen.
- Change the Order Date as needed. *Note: Each agency defines the max number of days an order can be backdated and future dates.
- The default doctor and employee will already be filled in. Change them as needed.
- Select the type of order from the Type dropdown list, as needed. As soon as you select a Type a time and date stamp will be inserted to the top of the screen. This can be deleted, as needed. Some items listed her will automatically pull up the Customize order content window. See full article details here.
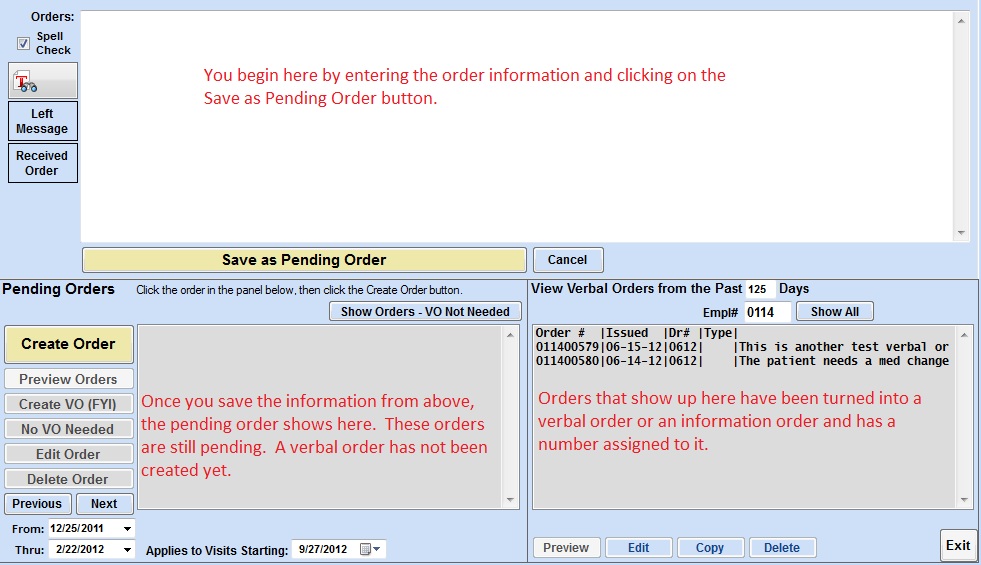
- In the large text box on the top half of the screen, type in the orders.
- Left Message / Received Order - You can date and time stamp the order by clicking these buttons. The current date and time will be inserted along with text for 'Left a message' and 'Order received'.
- [T]ext Item Box - This button allows you to see orders that your agency has entered as standard orders, and to select them rather than having to type frequently used orders.
- Click the Save as Pending Order button in the upper right. Notice that when you click the Save button, the order goes into the lower left panel, which is labelled Pending Orders.
- Click on the new order in the Pending Orders panel.
- Create VO or FYI 1) Click the Create Order if this is a standard verbal order requiring a signature from the nurse and ordering physician. Or 2) Click the Create VO (FYI) button to create an informational order. This indicates that this information does not require a signed order, but it needs to be documented and sent to the physician.
- A window will open with the print preview of the verbal order.
- To print this page, click the Print button in the upper left.
- IMPORTANT: Once you print this document, you will need to mail or fax it to the doctor.
- Close the print window. When you close the print window, you will see that the verbal order has now moved to the right panel, labelled Show Verbal Orders During the Past 125 Days. Orders on this side should be those that have been mailed.
NOTE: For information on how your agency can track these Informational/FYI Orders, please view the following article: Tracking Informational/FYI Orders.