1. If you are using POC, click the Time Sheets button on the main menu. From the main menu in Office, click the Employee Activity button then select Time Sheet from the sub-menu.2. Your name will appear at the top left corner. If you need to view another employee’s time sheet, change the employee number. If the Employee box is gray, then you do not have permission to change it.
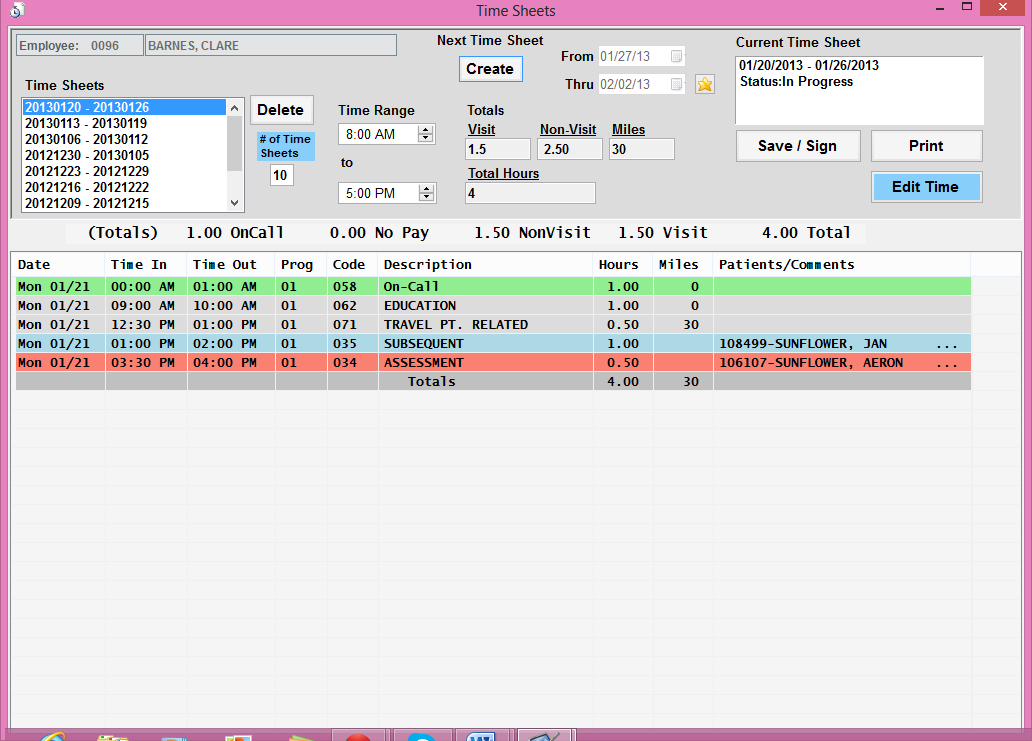
3. Below your name will be a list of weekly time sheets. By default, this list will show the most recent 10 time sheets. If you want to view a time sheet older than that, change the number below the # of Time Sheets box and click on the blue box.
4. When you first go into the time sheet screen, your most recent time sheet created should appear. To view older time sheets, click on the date range under the Time Sheets list in the top left corner. The view will show in date then time order.
5. To create the next time sheet, set click the Create button. The dates next to the Create button will be the next time sheet to be created. After you click the Create button, those dates are added to the list of Time Sheets.
6. The top middle section provides the totals for visits, non-visits, and miles for the week selected.
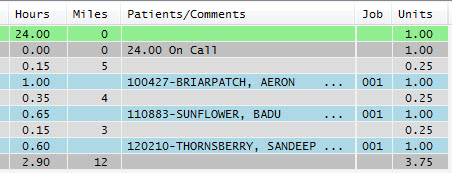
7. In the bottom large panel, will show the entries that you entered in along with visits. Some of these are color coded.
- Green - is On-Call Time
- Blue - is locked visit
- Red - is an unlocked visit. Go into Visits/Assessments to lock your visit
NOTE: If there are visits that have not been completed (unlocked), you will not be able to Save your Time Sheet.
- Grey - is non-visit time
- Dark Grey - total time for that day
8. If you need to edit your non-visit time, click on the Edit Time button. This will take you to your Non-Visit Entry screen (see Non-Visit Entry documentation as needed).
9. If you are finished with your time sheet for the work week, click on the Save/Sign button. NOTE: Clicking the Save/Sign button will Lock your time sheet. Once you click the Save/Sign button, you will get this popup:
Click on Yes to complete the time sheet. Click on No if you are not finished editing.
10. If you wish to print the time sheet, click the Print button. If you want your signature(s) to appear on the printed time sheet then check the box Print Signatures. The bottom of the printed page will show your electronic signature (if it has been captured in the system) and the date and time stamp indicating when you clicked on Save/Sign.
11. Any visits that are not locked will show up in BOLD print on the print preview.
How To Unlock A Timesheet:
If you need to edit your non-visit time, after you have already clicked on the Save/Sign button, your supervisor will need to unlock your timesheet. These are the steps:
o Go to the Time Sheets screen
o Enter the employees name or four digit employee number
o Select the time sheet date range that needs unlocked
o If the time sheet has not been approved yet click on the Approve button, then click on the Unlock button
o If the time sheet has already been approved then click on the Unlock button
o After the time sheet is unlocked then that employee will be able to edit their non visit time
NOTE: Make sure the time sheet dates are correct with no overlapping of previous or current dates.
o The employee will then need to Save/Sign that time sheet again
There are global setting options to add the job code related to visits and the payroll units.
From Barnestorm Office go to Codes > Security > Global Setting. Expand the Time Sheets category and answer questions 1030 and 1031 appropriately. NOTE: This process should be completed by clinical supervisors or office managers only.